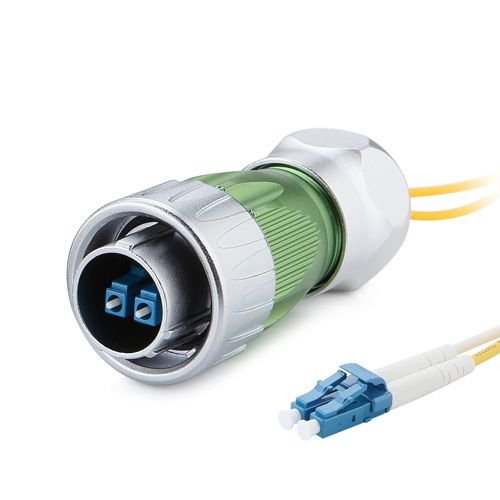
Reliable electrical connections are essential in environments where equipment is exposed to water, moisture, pressure, and demanding operating conditions. Marine systems, underwater equipment, industrial machinery, and outdoor electronics all require connectors that can maintain electrical performance while protecting internal contacts from harsh surroundings. Proper installation is therefore just as important as selecting the right connector.
A Micro 10-16 Core Watertight Connector is designed to provide secure multi-core electrical connections while helping prevent water and moisture from reaching sensitive electrical components. However, achieving dependable performance requires careful preparation, correct wiring, proper sealing, and thorough testing. This guide explains the installation process and the best practices that can help ensure a safe and long-lasting connection.
Understanding Multi-Core Watertight Connectors
Multi-core connectors are used when several electrical circuits need to pass through a single connection point. Instead of installing separate connectors for individual wires, a multi-core design allows multiple conductors to be organized within one compact interface.
Watertight construction is particularly valuable in marine and underwater applications. Moisture can cause corrosion, short circuits, insulation deterioration, and signal problems. A properly sealed connector creates a protective barrier around the electrical contacts, reducing the possibility of water intrusion.
Before beginning installation, it is important to understand the connector’s core configuration, pin arrangement, voltage and current requirements, cable compatibility, and sealing method. Always follow the manufacturer’s specifications because connector designs and installation procedures can vary.
Tools and Materials Required
Having the correct tools available before starting can make installation easier and reduce the risk of mistakes. Depending on the connector design, you may need:
- Appropriate electrical cable
- Wire cutters and strippers
- Crimping or termination tools
- Small screwdrivers if required
- Multimeter or continuity tester
- Heat-shrink tubing where applicable
- Approved sealing components
- Cleaning materials
- Cable labels or markers
- Manufacturer-specified installation accessories
Avoid using damaged tools or unsuitable sealing materials. A connector may be mechanically secure but still fail to provide adequate water protection if the wrong components are used.
Step 1: Inspect the Connector and Cable
Begin by inspecting all components carefully. Check the connector body, contacts, seals, gaskets, locking mechanism, and cable for visible damage. Look for cracks, bent pins, contamination, or deterioration.
The cable should also be checked for cuts, damaged insulation, moisture, or signs of previous electrical failure. Never install a connector using a cable that is already compromised.
Review the connector’s wiring diagram before cutting or terminating any wires. Correct pin identification is essential when working with multiple conductors because one misplaced wire can cause incorrect operation or potentially damage connected equipment.
Step 2: Prepare the Cable
Measure the cable carefully and determine how much insulation needs to be removed. Use an appropriate wire stripper to avoid damaging the conductors.
Each conductor should remain clean and intact. Do not remove excessive insulation because exposed conductor length can affect the quality and safety of the termination. Similarly, avoid cutting individual strands of a stranded conductor during preparation.
Labeling each wire before termination is especially helpful with connectors containing numerous cores. Clear identification reduces the possibility of crossed connections and makes future maintenance easier.
Step 3: Connect the Conductors
The next stage is connecting each conductor to its designated contact. Depending on the connector design, this may involve crimping, soldering, screw terminals, or another approved termination method.
When using crimp contacts, select the correct crimping tool and contact size. A poor crimp may create high electrical resistance, heat buildup, intermittent operation, or eventual failure.
If soldering is specified, apply heat carefully and avoid excessive solder or heat exposure. The finished connection should be mechanically stable and electrically sound.
After completing each termination, gently check the wire to ensure that it is securely attached. Do not pull aggressively, as excessive force could damage the contact or conductor.
Step 4: Install the Sealing Components
Water protection depends heavily on correctly installed seals. Carefully position gaskets, O-rings, cable seals, or other waterproofing components according to the manufacturer’s instructions.
Inspect sealing surfaces before assembly. Dirt, dust, damaged rubber, or trapped debris can create small pathways for moisture.
Do not force a seal into an incorrect position. If an O-ring becomes twisted or pinched, the connector may lose its watertight properties even if the exterior appears properly assembled.
Lubrication should only be used when recommended by the connector manufacturer, and the lubricant must be compatible with the sealing material.
Step 5: Assemble and Lock the Connector
Once all conductors and seals are correctly positioned, carefully bring the connector components together. Make sure the alignment features match before applying pressure.
A locking mechanism may involve a threaded coupling, bayonet-style connection, latch, or another retention system. Secure the connector according to the specified procedure. Avoid overtightening because excessive force can damage threads, seals, or housing components.
A correctly assembled Micro 10-16 Core Watertight Connector should have its components properly aligned and firmly secured without visible gaps or displaced seals.
Step 6: Perform Electrical Testing
Testing should be completed before the connector is placed into service. A multimeter can be used to verify continuity between the appropriate contacts.
Check each circuit individually and confirm that there are no unintended connections between separate conductors. If the system requires polarity verification, confirm positive and negative connections as well.
Testing is particularly important for multi-core systems because wiring errors can be difficult to identify after equipment has been installed.
Where the application requires specialized insulation-resistance or dielectric testing, use equipment and procedures appropriate for the electrical system and connector specifications.
Step 7: Check the Watertight Seal
Electrical testing alone does not confirm that the connector is waterproof. The physical sealing system must also be inspected.
Look around the connector housing for gaps, displaced seals, or improperly seated components. If the application requires pressure or immersion testing, perform the test according to the connector manufacturer’s recommended procedure.
Never assume that a connector is watertight simply because it feels tight. Proper sealing depends on the complete assembly, including the cable entry, contacts, housing, and locking components.
Common Installation Mistakes to Avoid
Several mistakes can reduce connector reliability. One of the most common is incorrect wire identification. Always compare the wiring layout with the manufacturer’s pinout.
Another problem is damaging seals during assembly. Pinched, twisted, dirty, or incorrectly sized sealing components can allow water to enter.
Using the wrong cable diameter can also compromise waterproofing. Cable seals are generally designed for specific cable sizes, so compatibility should be confirmed before installation.
Avoid excessive bending or pulling immediately behind the connector. Mechanical stress can eventually damage conductors and terminations. Providing appropriate strain relief can significantly improve long-term reliability.
Finally, do not skip testing. A few minutes of electrical and physical inspection can prevent much larger problems after installation.
Maintenance After Installation
Even a properly installed connector should be inspected periodically in demanding environments. Check the housing for cracks, corrosion, physical damage, or contamination.
Inspect cable entry points and seals for deterioration. If the connector is exposed to saltwater, chemicals, vibration, or extreme temperatures, more frequent inspections may be appropriate.
Keep connection surfaces clean and dry during maintenance. If corrosion or damage is discovered, investigate the underlying cause rather than simply reconnecting the components.
Proper maintenance helps extend service life and reduces unexpected electrical failures.
Why Proper Installation Matters
The main purpose of a Micro 10-16 Core Watertight Connector is to provide dependable electrical connectivity while protecting the connection from moisture and environmental exposure. Its performance, however, depends on more than the connector itself.
Correct cable preparation, accurate pin assignment, reliable terminations, properly positioned seals, appropriate assembly, and thorough testing all contribute to system reliability. When these steps are performed carefully, the connector can become an effective component of marine, industrial, underwater, and outdoor electrical systems.
About hysfsubsea
hysfsubsea focuses on connection solutions designed for demanding marine and subsea environments where dependable electrical performance is essential. For applications involving water exposure, underwater equipment, and specialized electrical systems.
Choosing suitable connector designs and following correct installation practices can help improve operational reliability. Working with experienced suppliers can also make it easier to select suitable configurations, materials, and sealing solutions for specific project requirements.
Conclusion
Installing a multi-core watertight connector correctly requires attention to both electrical and mechanical details. From inspecting the components and preparing the cable to terminating conductors, positioning seals, assembling the housing, and completing final tests, every stage contributes to overall reliability.
A Micro 10-16 Core Watertight Connector can be a valuable solution for applications where multiple electrical circuits must operate in environments exposed to moisture or water. By following manufacturer instructions, using compatible materials, avoiding common installation mistakes, and maintaining the connection regularly, users can achieve a secure and durable electrical interface suitable for demanding operating conditions.