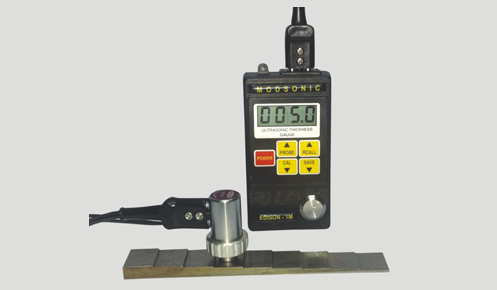
Ultrasonic Thickness Gauges are powerful tools used across industries to measure the thickness of materials without cutting, drilling, or damaging the object being tested. From inspecting pipelines and pressure vessels in oil & gas to checking welds and coatings in manufacturing or marine sectors, these instruments are crucial for non-destructive testing (NDT) and maintenance.
However, the accuracy of any ultrasonic thickness measurement relies heavily on proper calibration. Without it, even the best gauge can produce misleading results—potentially risking safety, compliance, or costly rework.
Whether you’re a field technician, engineer, or maintenance professional, understanding how to calibrate Ultrasonic Thickness Gauges like a pro is essential. In this blog, we’ll walk through everything you need to know: why calibration matters, how to do it correctly, common mistakes to avoid, and best practices to ensure your readings are spot-on every time.
Why Calibration Is Crucial
Calibration aligns the ultrasonic gauge with the acoustic properties of the material being tested. Different materials transmit sound at different speeds (known as sound velocity), and surface conditions can also affect signal accuracy. Without proper calibration, the gauge may interpret the returned signal incorrectly, leading to inaccurate thickness measurements.
Poor calibration can result in:
-
Overestimating remaining wall thickness, posing safety risks.
-
Underestimating thickness, leading to unnecessary repairs or downtime.
-
Regulatory compliance failures in industries with strict inspection standards.
In short, calibration is not a “nice to have”—it’s the foundation of reliable ultrasonic inspection.
When Should You Calibrate?
You should calibrate your Ultrasonic Thickness Gauge:
-
At the beginning of every job or shift
-
When changing materials (e.g., switching from steel to aluminum)
-
After changing the probe or couplant
-
When temperatures fluctuate significantly
-
If readings appear inconsistent or suspicious
-
After a fall or impact to the device
Routine calibration ensures that environmental variables or equipment changes don’t compromise the integrity of your results.
Types of Calibration
Depending on the application, material, and required accuracy, you’ll typically use one of the following calibration methods:
1. Single-Point Calibration
This involves calibrating the gauge using a single known thickness standard. It’s quick and useful for general-purpose measurements on uniform materials.
Best for:
-
Consistent, flat surfaces
-
Field checks or when time is limited
How to do it:
-
Use a calibration block made of the same material as your test object.
-
Enter the known thickness value into the gauge.
-
Place the transducer on the block and adjust until the reading matches the standard.
2. Two-Point Calibration
This method uses two known thickness values to improve accuracy over a range. It’s especially useful for measuring materials that vary in thickness or have non-linear acoustic properties.
Best for:
-
Varying material thicknesses
-
Precision applications
-
Calibrating for material sound velocity
How to do it:
-
Select two calibration standards of the same material but different thicknesses (e.g., 5mm and 10mm).
-
Input both values into the gauge.
-
Place the probe on each and adjust accordingly.
3. Velocity Calibration
This method involves adjusting the device to match the material’s specific sound velocity. Some gauges allow manual entry of known velocity values for specific materials (e.g., steel = 5,900 m/s).
Best for:
-
When thickness is unknown but velocity is known
-
Measuring rare or unique materials
Step-by-Step Guide: How to Calibrate Like a Pro
Whether you’re in a refinery, a shipyard, or a fabrication plant, the following step-by-step guide will help ensure professional calibration results.
Step 1: Start with a Clean Surface
Clean both the transducer and the surface of the calibration block or test material. Remove dirt, rust, scale, or oil that could interfere with signal transmission.
Step 2: Apply the Correct Couplant
Apply a generous amount of couplant between the transducer and the surface. Couplant (usually a gel or liquid) removes air gaps that block ultrasonic waves and ensures a reliable connection.
Step 3: Select the Appropriate Probe
Choose a transducer suited for your material and thickness range:
-
Higher frequency (5–10 MHz) for thin or fine-resolution applications.
-
Lower frequency (2–2.25 MHz) for thicker or corroded materials.
Check your device manual or consult with the manufacturer for probe compatibility.
Step 4: Choose the Calibration Mode
Access your gauge’s settings to select single-point, two-point, or velocity calibration. Some gauges offer an auto-calibration function for added convenience.
Step 5: Calibrate Using Known Standards
Follow the procedure based on your chosen method:
-
For single-point: Place the probe on the standard block and match the reading to the known value.
-
For two-point: Repeat this step for each thickness standard.
-
For velocity: Input the known sound velocity or adjust until the displayed reading matches your known material thickness.
Step 6: Confirm Consistency
Take several readings to verify accuracy. If readings vary, repeat the calibration or check for common issues (like poor couplant application or probe instability).
Step 7: Lock in the Calibration
Once calibration is successful, save the settings (if your gauge allows it) and begin testing. Many modern gauges allow saving multiple calibration setups for different materials, which saves time on future jobs.
Avoid These Common Calibration Mistakes
Even experienced technicians can make errors. Here are some common pitfalls to avoid:
-
❌ Using the wrong material for the reference block
Always calibrate with the same material type you’ll be testing. -
❌ Not using enough couplant
Air gaps lead to poor signal transmission and bad readings. -
❌ Skipping recalibration after temperature changes
Heat affects sound velocity—recalibrate when working in hot or cold environments. -
❌ Failing to account for coatings or corrosion
Use echo-to-echo or multiple-echo modes when measuring through coatings to avoid including them in thickness results. -
❌ Assuming the gauge is “always right”
Double-check when results seem unusual; recalibrate when in doubt.
Tips for Better Field Accuracy
-
✅ Use multiple readings at each point—take the lowest consistent value as your result.
-
✅ Hold the probe steady and perpendicular to the surface to avoid skewed measurements.
-
✅ Practice on test blocks regularly to keep your skills sharp.
-
✅ Use data logging features to track calibration history and inspections.
-
✅ Inspect your probe regularly for wear or cable damage.
Choosing a Quality Gauge: Why It Matters
Even perfect technique won’t help if your device lacks the precision or reliability needed for industrial use. That’s why professionals around the world trust Cygnus Instruments, a renowned manufacturer and supplier of ultrasonic thickness gauges.
Cygnus Instruments pioneered multiple-echo technology, allowing their gauges to measure through coatings without needing to strip them away—a critical feature for oil & gas, marine, and infrastructure inspections. With rugged construction, intuitive operation, and highly accurate readings, Cygnus gauges are a top choice for technicians who depend on reliability in demanding environments.
Whether you’re calibrating daily on an offshore platform or conducting periodic testing in a fabrication shop, having the right equipment makes all the difference.
Final Thoughts
Proper calibration is the backbone of accurate, reliable ultrasonic thickness measurements. It ensures that your Ultrasonic Thickness Gauges deliver trustworthy results, helping you maintain structural integrity, safety standards, and regulatory compliance.
By learning how to calibrate like a pro—and avoiding common mistakes—you’ll not only improve your confidence in the field but also reduce downtime, rework, and safety risks.
So, next time you power up your gauge, take the extra minute to calibrate properly. It’s a small step that leads to precise results—and peace of mind.