Powering Up Your Space Safely and Smartly:
Electricity is the silent hero of modern life, powering everything from our lights to our laptops. And at the center of this convenience is the humble electrical outlet—a small but mighty component that keeps our homes running smoothly. Whether you’re adding an outlet to accommodate a new appliance, upgrading an old system, or doing a full remodel, understanding electrical outlet installation is crucial.
This guide is designed for homeowners, DIYers, and curious minds alike. We’ll cover every angle of electrical outlet installation, from safety basics to choosing the right tools, understanding wiring techniques, complying with code, and deciding when to call a professional. Think of this as your blueprint for safely bringing power exactly where you need it.
Types of Electrical Outlets and Their Functions:
Electrical outlets installation aren’t one-size-fits-all. Before grabbing your screwdriver, it’s essential to know the different types of outlets and their specific use cases:
Standard 120V Outlets:
These are your everyday outlets for lamps, TVs, and chargers.
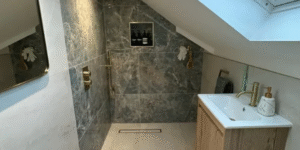
GFCI Outlets (Ground Fault Circuit Interrupters):
Designed for wet areas like bathrooms and kitchens, they prevent electric shock.
AFCI Outlets (Arc Fault Circuit Interrupters):
Required in bedrooms and living spaces to prevent fire risks.
USB Outlets:
Modern outlets with built-in USB ports for easy device charging.
240V Outlets:
For large appliances like dryers or ovens.
Understanding the differences helps ensure safety and compliance. For example, installing a GFCI near a sink is not just smart—it’s code.
Additionally, outlet placement matters. Code typically requires outlets every 12 feet in living areas and within 2 feet of any counter in a kitchen. Getting these details right ensures your installation is both practical and legal.
Planning Your Installation:
Before installing , solid planning saves you from future headaches. Here’s a checklist of what you’ll need:
Tools:
Voltage tester, wire stripper, screwdriver, drill, electrical box, fish tape.
Safety Gear:
Insulated gloves, goggles, and a voltage tester are non-negotiable.
Materials:
Electrical boxes, Romex wire (size depending on circuit), outlet covers, cable staples.
Start by identifying where the new outlet will go. Consider what devices will use it, how much power they’ll draw, and if the circuit can handle the load. Use a stud finder to avoid drilling into framing or pipes.
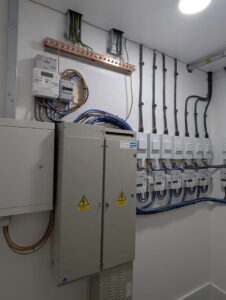
Planning also involves shutting off power to the work area—test with a voltage tester to be 100% sure. It’s wise to label your breaker box, as guessing can be dangerous.
If you’re unsure of your home’s circuit layout, mapping it out now can help prevent overloads and tripped breakers in the future.
Step-by-Step Installation Guide:
Once your tools and plan are in place, it’s time to go. Here’s how to install electrical outlet step by step:
Turn Off Power:
Switch off the breaker and test with a voltage tester.
Mark and Cut Drywall:
Trace your electrical box and cut the drywall carefully.
Install the Box:
Secure the outlet box between studs or use a remodel box for retrofit.
Run Wires:
Feed Romex wire from the power source to your outlet location using fish tape.
Strip Wires:
Use a wire stripper to expose about ¾ inch of copper.
Connect Wires:
Attach black to brass (hot), white to silver (neutral), and green/bare to the ground screw.
Secure the Outlet:
Screw the outlet into the box and attach the cover plate.
Restore Power and Test:
Turn the breaker back on and test the outlet with a voltage tester.
Doing this with confidence comes from preparation. If you hit snags—like mystery wires or unexpected sparks—it might be time to consult a pro. Visit on sites dailystorypro.com
Troubleshooting Common Issues:
Even with meticulous care, things can go wrong. Some common issues include:
Outlet not working:
Double-check wire connections and make sure the breaker is on.
Tripped breaker:
You may have overloaded the circuit—unplug a few items or check for short circuits.
Buzzing sound:
Indicates loose wiring or a bad outlet—shut off power and inspect immediately.
Sparks or burning smell:
Disconnect power and replace the outlet or call a professional ASAP.
Troubleshooting is a process of elimination. A multimeter is your best friend when diagnosing problems—it can measure voltage and continuity to identify dead wires or faulty outlets.
Also, always use code-compliant equipment. That “cheaper” outlet might save a few dollars today but cost you in repairs or safety risks tomorrow.
When to DIY and When to Hire an Electrician:
DIY electrical work can be empowering, but it’s not for everyone or every project. Here’s when you should probably call in a pro:
You’re dealing with 240V circuits or major appliances.
Your home has aluminum wiring, which requires special connectors and handling.
You encounter complex wiring configurations like three-way switches or junction boxes.
You’re uncertain about code compliance—especially when permits are required.
Professional electricians bring expertise and peace of mind. Most charge a flat rate for outlet installation—usually between $100–$200 depending on the job complexity.
Doing it yourself saves money and teaches valuable skills, but know your limits. There’s no shame in calling someone trained to handle it all safely.
Conclusion: Empowering Your Home, One Outlet at a Time:
Installing an electrical outlet might seem like a small job, but it’s a task that carries big responsibilities. With the right tools, planning, and safety precautions, it’s a doable project for many homeowners. Still, knowing when to call in a pro ensures you’re never in over your head.
This guide aimed to make the process approachable, informative, and even a bit exciting. After all, adding an outlet isn’t just a utility upgrade—it’s about building a smarter, safer, and more functional living space.
So whether you’re powering up a new home office, installing outlets in your kitchen remodel, or just replacing outdated units, you’ve got the knowledge to do it right. Stay safe, stay informed, and let your home shine—one outlet at a time.