wavlink extender not working
Requirement for seamless internet connectivity is non-negotiable. There is no sphere of life where the internet isn’t needed. For making your abode and office space free from wifi dead zones you definitely require Wavlink wifi range extender. But when it stops functioning, everything comes to a halt. So in this particular post we’ll help with the fixation of the same. There can be multiple reasons behind the Wavlink extender not working. We’ll dive deeper to find every possible solution. So with no further stalling, let’s get started.
Rightly Configure The Extender
The very first culprit behind the Wavlink extender not working can be the incorrect configuration. So here are the right configuration steps:
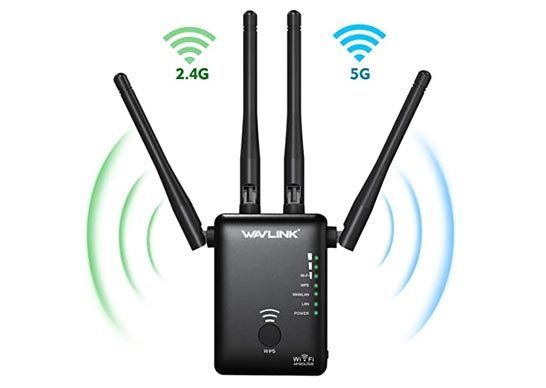
- First plot the Wavlink device near to the router.
- With the help of a given power wire, activate the extender.
- Wait for it to start up properly.
- Thereafter, click the router’s WPS button.
- Do not waste even a second and immediately click extender’s WPS button as well.
- With this the WPS indicators will light up and you just have to wait for them to turn steady.
- Finally, as the setup is now complete, you can reposition the signal repeater to a more strategic location.
Ensure Right Placement Of The Extender
If the placement of the extender is not up-to-mark then again Wavlink extender not working issue will prevail. So for accurate placement, follow below written pointers:
- Plot the Wavlink device at an equal distance from the router and from the area of concern. This particular spot should be able to fetch at least half of the signals from the router. Because for proper working of the extender, the communication between the router and the extender is crucial.
- Next up, do not keep the extender directly on the floor as it can affect signal transmission. So you should choose a highly elevated spot for the placement. Spots like shelves and table tops will work great.
- Do not make a mistake of placing the extender in any box or near to gadgets like microwave, cordless phones, fish tanks, baby monitors, aluminium doors, vigilance cameras, on top of the refrigerator or closer to bluetooth devices. As all these objects hold the potential to block all the repeater’s signals.
When you follow these right placement strategies, you won’t face Wavlink extender not working issues.
Rebooting Can Help
Before you dive into other technical troubleshooting points, first you must try rebooting the extender. This not only refreshes the connection but also holds the potential to solve minor technical jargons. For reboot, follow these steps:
- Unplug all the wires from the extender.
- Turn off the power.
- Let the extender stay in the same condition for a minute.
- Thereafter, replug everything back.
- Now as you will repower the extender, it might work rightly. But if it doesn’t then you can check out the next steps.
Scan For Firmware Updates
Corrupted or outdated firmware can also be the root cause behind the Wavlink extender not working. So to look for the same, you need to login into the main dashboard.
- First take a smart device. With the help of wireless information that is written on the extender’s base/bottom panel, pair the device to the extender. Moreover, you can simply use the ethernet wire for establishing this connection.
- Now open the internet browser. Choose a compatible one like chrome, firefox, safari, edge or internet explorer. Thereafter visit the URL blank. In it type http://192.168.10.1. Click Enter.
- Now fill up the password. It is “admin”. With that click on Login.
- From the panel choose the option of Setup. Scroll and there you’ll find Firmware Upgrade option. Tap on it to scan for updates. If found, start the installation then and there.
As the installation finishes, you’ll see a major difference not only in the network performance but also in the security. Thus the Wavlink extender might get back to its best working abilities.
Reset When Nothing Works
Before reset, first recheck the wirings. None of it should be loose. Also the wires shouldn’t have breaks in between. Thereafter make sure the supply of electricity to the extender is also adequate. In addition to it, make sure there is no problem with the router. It must have a connection to the internet source. When everything is correct from configuration to placement but still Wavlink extender not working issue persists then choose the last resort which is factory reset.
- For reset, power on the extender.
- Let it boot up.
- Depending on the model of your extender you might require a small sturdy toothpick. But if the extender has a solid reset button, then you just need to click and hold it for eight seconds. With this the device will reset.
- Whereas if the extender inhibits a reset port then you have to insert the toothpick or pin into it. Push it. Hold for 8 seconds. Release.
Now the extender is back to its original settings. You can redo the configuration. If the Wavlink extender not working problem continues then calling the experts is crucial. As the hardware problems could be there.