How to Successfully Complete Your Own Ventilation Installation
Ventilation Installation is a key aspect of creating a healthy indoor environment, as it ensures consistent air circulation and prevents the accumulation of airborne pollutants. Without adequate ventilation, spaces can become stagnant, trapping moisture and harmful particles such as dust, allergens, and volatile organic compounds (VOCs). These issues can lead to poor air quality, affecting both health and overall comfort within your home.
In addition to improving air quality, ventilation systems play an essential role in regulating indoor temperature. They help to expel excess heat during warmer months and reduce dampness during colder seasons, creating a balanced and more pleasant living environment. For homes with specific needs, such as those prone to condensation or mould growth, a properly designed ventilation system can address these challenges effectively.
Moreover, efficient ventilation can contribute to energy savings when integrated with modern energy recovery systems. These systems minimise heat loss during the exchange of indoor and outdoor air, enhancing both efficiency and sustainability. For those with respiratory conditions, such as asthma or allergies, well-installed ventilation can significantly reduce the triggers that worsen symptoms, providing a safer living space.
By addressing both practical and health concerns, a carefully planned ventilator installation ensures your home remains comfortable, hygienic, and energy-efficient throughout the year.
Assessing the Ventilation Needs of Your Space
Before proceeding with a ventilation install it’s essential to understand the unique requirements of your property. Start by evaluating the purpose of each space. For example, kitchens and bathrooms often have higher levels of moisture and odours, while basements may struggle with dampness and poor airflow. These factors make such areas prime candidates for ventilation systems.
Consider the size and layout of the rooms, as these directly affect airflow patterns and the capacity needed from the system. Larger or open-plan spaces may require more robust solutions, while smaller rooms might benefit from simpler systems. Additionally, assess any existing ventilation, such as windows or extractor fans, and determine whether they are sufficient or need improvement.
It’s important to think about potential problem areas, such as spaces prone to condensation or mould. Take note of any signs of poor ventilation, including persistent humidity, musty smells, or excessive dust. Rooms with high occupancy, such as living rooms or bedrooms, may also require enhanced ventilation to maintain a healthy indoor environment.
Lastly, external factors should also be taken into account. Homes in areas with high outdoor pollution or nearby sources of allergens may benefit from systems with advanced filtration features. Identifying these requirements early ensures you select a solution tailored to your property’s needs.
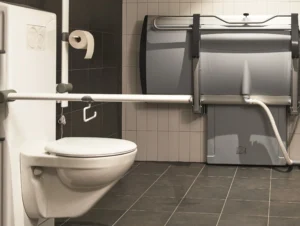
Choosing the Right Type of Exhaust Ventilation System for Your Home
There are various types of ventilation systems available, and selecting the most suitable one for your home is essential to achieving efficient air circulation. Exhaust Ventilation System are a popular choice for removing stale air from specific areas, such as kitchens and bathrooms. However, they may create slight pressure imbalances if not paired with adequate air intake. Supply ventilation systems, on the other hand, introduce fresh air into your home but require careful placement to prevent uneven airflow.
1. Understand Different Types of Exhaust Ventilation Systems
Before choosing a system, learn the basic types such as single‑fan, multi‑fan, and continuous ventilation systems. Each type offers different levels of airflow and control, so comparing their designs helps you select one that fits your home’s layout and needs.
2. Consider Your Home’s Size and Layout
The size of your home and how rooms are arranged influence the type of ventilation system needed. Larger homes or those with multiple floors may require more powerful or multiple exhaust fans to ensure proper air circulation, while smaller homes might only need compact, strategically placed units.
3. Evaluate Airflow Capacity and CFM Rating
Airflow capacity, measured in cubic feet per minute (CFM), determines how much air a ventilation system can move. Higher CFM ratings are suitable for larger spaces or areas with heavy moisture (like bathrooms or kitchens), while lower CFM units are ideal for smaller rooms and energy efficiency.
4. Energy Efficiency and Operating Costs
Energy‑efficient ventilation systems help reduce electricity bills while maintaining good indoor air quality. Look for models with energy‑saving features such as variable speed controls, timers, or motion sensors that adjust operation based on need, lowering energy use without compromising performance.
5. Noise Levels and Installation Requirements
Different ventilation systems produce varying levels of noise, which can affect comfort in living spaces. Choose a model with quieter operation if noise is a concern, and consider installation requirements such as ductwork, roof or wall mounting, and whether professional installation is necessary for optimal performance.
Gathering the Necessary Tools and Materials for Installation
To carry out a successful ventilation install, it is vital to assemble the appropriate tools and materials beforehand. Start by ensuring you have essential tools, including a drill for securing components, a saw for creating precise openings, and a screwdriver for fastening. A measuring tape is critical for accurate measurements, and a level will help ensure proper alignment of the system. Protective equipment, such as gloves and safety goggles, should also be on hand to ensure safety throughout the process.
In terms of materials, you will need ductwork suited to the size and type of your ventilation system, along with connectors to join sections securely. Vents or grilles appropriate for your chosen system are necessary, as they help regulate airflow and provide a neat finish. Screws, brackets, and sealant tape are required to ensure the components remain secure and airtight, minimising the risk of air leaks. Depending on your system, insulation materials may also be necessary to reduce noise and energy loss.
Gathering these tools and materials ahead of time can help you avoid delays and ensure a smoother installation process. Verify that all items are compatible with your specific system to achieve the desired results.
Planning and Preparing for the Installation Process
Effective preparation is essential for a successful ventilation install. Start by identifying the most suitable locations for ducts, vents, and other components, considering the layout and airflow requirements of your space. Use a detailed diagram to map out the placement of each element, ensuring it aligns with your chosen system and avoids obstructions such as structural beams or electrical wiring.
Check your tools and materials to confirm they are appropriate for the job and in good working order. Inspect your ventilation components for any damage or defects before beginning, as these can compromise the system’s performance if left unaddressed.
Before cutting or drilling, mark all necessary points with precision to reduce errors. If working near existing utility lines, use a detector to locate pipes or wires, minimising the risk of accidental damage. For larger projects or installations in hard-to-reach areas, consider seeking assistance to ensure both safety and efficiency during the process.
Lastly, consult your ventilation system’s manual or installation guide for specific requirements, as these may vary depending on the model. Understanding these details will enable you to approach the installation process confidently and ensure compatibility with your property.
Step-by-Step Guide to Installing Your Exhaust Ventilator System
– Step 1: Preparing the Installation Site
Begin by ensuring the installation area is clear of obstructions, such as furniture or stored items. Use a stud finder or wire detector to identify hidden structures, such as electrical wiring or support beams, to avoid damaging them during the installation.
– Step 2: Measuring and Marking Duct Locations
Measure the areas where the ducts and vents will be positioned. Mark these points accurately with a pencil or marker to reduce errors during the installation process.
– Step 3: Cutting Holes for Vent Openings
Using a hole saw or a jigsaw, carefully cut out openings for the vents and ducts. Ensure the edges are smooth to allow a secure fit for the components.
– Step 4: Installing Ductwork
Position the ducts according to your planned layout. Connect each section using appropriate connectors, ensuring all joints are sealed with tape to prevent air leaks.
– Step 5: Securing Vents and Grilles
Attach vents or grilles over the openings, securing them with screws. Ensure they are flush with the surface for a professional finish.
– Step 6: Final System Check
Inspect all connections, ensuring they are tight and properly aligned. Confirm that all openings are sealed and that the system is ready for testing.
Connecting and Securing Ventilation Components
After positioning the ducts according to your plan, ensure each section is securely joined using the appropriate connectors. Use screws to fasten the ducts firmly in place, and seal all joints with high-quality duct tape to prevent air leakage. If insulation is required for noise reduction or energy efficiency, wrap the ducts carefully with the chosen material, ensuring full coverage without gaps.
When attaching ducts to vents or grilles, align the components precisely to ensure a tight fit. Secure them using brackets or additional fasteners as needed, checking for stability to avoid future loosening. For ceiling or wall-mounted components, double-check alignment with a level before fully tightening any screws.
To minimise vibrations or rattling during operation, use flexible duct connectors in areas where movement is expected. Additionally, check that the dampers, if included in the system, are installed correctly and can operate freely. Any restrictions in movement could affect airflow efficiency.
Finally, ensure that all fixings are tight without overtightening, which could damage the components. Take care to clean away any debris left behind during the installation process, as this could interfere with the system’s operation or affect its long-term performance.
Testing the Ventilation System for Proper Functionality
Begin by turning on the ventilation system and observing its operation in each area it serves. Use your hand or an airflow metre to check that air is moving consistently through the vents, ensuring there are no blockages or weak spots. Pay close attention to areas where ducts connect, as improperly sealed joints can result in reduced performance.
Inspect the system for any unusual sounds, such as rattling or vibrations, which could indicate loose components or misaligned ductwork. Adjust connections and re-secure any fittings if necessary to eliminate noise.
If your system includes filters, verify that they are correctly installed and free of obstructions. Systems with dampers should be tested to ensure they open and close as intended, allowing for proper control of airflow.
For energy recovery or heat recovery ventilation systems, confirm that the exchange units are functioning efficiently by checking for temperature differences between incoming and outgoing airflows. This will ensure the system is maintaining energy efficiency as designed.
Lastly, walk through the property to ensure no airflow imbalance exists, such as certain rooms receiving stronger ventilation than others. Address any discrepancies by adjusting dampers or system settings to achieve a uniform distribution of air.
Conclusion
A Ventilation Installation not only enhances the comfort of your home but also addresses health and environmental concerns. Proper planning ensures the system integrates seamlessly into your property, avoiding structural disruptions or inefficiencies. Attention to detail during installation, such as sealing duct joints and ensuring precise alignment, is essential for reducing energy loss and maintaining optimal airflow. Adapting your ventilation system to the specific needs of your home, whether it involves moisture control, air filtration, or noise reduction, can make a significant difference in its effectiveness. Using high-quality materials and following manufacturer guidelines helps to prevent issues such as air leakage or component failure. Regular maintenance, such as cleaning filters and checking for blockages, can prolong the system’s lifespan and sustain its performance. Modern systems with energy recovery features can also help reduce energy consumption, making them a practical choice for those aiming to improve sustainability. By taking a thoughtful approach to both installation and upkeep, you can create a healthier and more energy-efficient living space that suits your household’s requirements.
6 FAQS
1. How can I identify whether my Ventilation Installation is functioning efficiently?
Check for consistent airflow across all vents and ensure there are no unusual sounds or odours. Use an airflow metre for precise measurements if needed Ventilation Installation.
2. Can I replace parts of my ventilation system without replacing the entire setup?
Yes, components such as filters, grilles, or sections of ductwork can often be replaced individually, provided they are compatible with your existing system.
3. Are there specific ventilation systems designed for homes in humid climates?
Yes, systems with dehumidification features or those designed to manage moisture levels are suitable for humid environments.
4. What should I consider when choosing filters for my ventilation system?
Consider the filtration level required. For homes with allergies or high pollution exposure, HEPA filters or filters rated for fine particles are ideal.
5. How long does it take to install a ventilation system?
Installation times vary based on the complexity of the system, ranging from a few hours for simple setups to a few days for larger, more intricate systems.
6. How can I reduce noise from my ventilation system?
Use insulated ducts, vibration dampeners, and ensure components are securely installed to minimise operational noise.
| Related Business Listings |
| Contact Directory |
| Local Business Profiles |