Are you considering installing a solar tracker to enhance the efficiency of your solar panel system? Look no further! In this comprehensive guide, we will walk you through the process of installing a dual-axis solar tracker, which can significantly increase the energy output of your solar panels. Solar trackers are mechanical devices that automatically orient solar panels toward the sun, maximizing their exposure to sunlight throughout the day. Dual-axis trackers are especially efficient as they can track the sun’s movement in both the horizontal and vertical axes. Let’s dive into the steps involved in installing a dual-axis solar tracker and take your solar panel system to the next level.
What is a Solar Tracker?
Before we delve into the installation process, let’s first understand what a solar tracker is and how it can benefit your solar panel system. As mentioned earlier, a solar tracker is a device that automatically adjusts the position of solar panels to maximize their exposure to sunlight. By tracking the sun’s movement throughout the day, solar trackers can increase the energy output of solar panels by up to 25% compared to fixed-tilt systems. This increase in energy production can result in significant cost savings and a faster return on your investment in solar panels.
Why Choose a Dual Axis System?
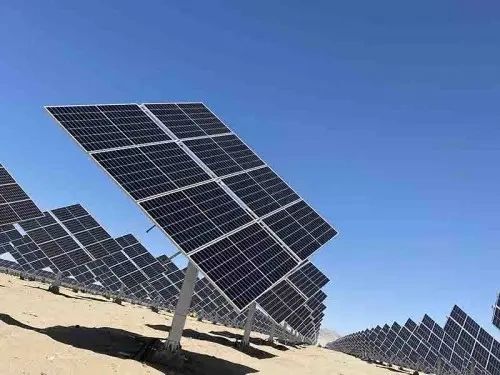
When it comes to solar trackers, dual-axis systems offer the highest level of efficiency and energy output. Unlike single-axis trackers that only track the sun’s movement in one direction, dual-axis trackers can adjust solar panels in both the horizontal and vertical axes. This allows them to capture sunlight from the moment it rises in the east to when it sets in the west, maximizing energy production throughout the day. While dual-axis systems may be more expensive than single-axis or fixed-tilt systems, the additional energy output they provide makes them a worthwhile investment for those looking to maximize the efficiency of their solar panel system.
Installing a Dual Axis Solar Tracker
Now that you understand the benefits of a dual-axis solar tracker, let’s walk through the installation process. While the exact steps may vary depending on the specific tracker you choose, here is a general overview of what is involved in installing a dual-axis solar tracker:
- Site Preparation: Before installing the solar tracker, ensure that the site is clear of any obstructions that could block sunlight, such as trees or buildings. The tracker should be installed in an area with ample sunlight throughout the day.
- Foundation Installation: Begin by installing the foundation for the solar tracker. This may involve digging holes and pouring concrete to secure the tracker in place. Make sure the foundation is level and sturdy to support the weight of the tracker and solar panels.
- Tracker Assembly: Once the foundation is in place, assemble the dual-axis solar tracker according to the manufacturer’s instructions. This may involve attaching the tracking mechanism, motors, and sensors to the frame of the tracker.
- Panel Mounting: After the tracker is assembled, mount the solar panels onto the tracker. Make sure the panels are securely attached and properly wired to maximize energy production.
- Wiring and Testing: Finally, wire the tracker to your solar panel system and test its functionality. Ensure that the tracker is accurately tracking the sun’s movement and adjusting the position of the solar panels accordingly.
Conclusion
By installing a dual axis solar tracker, you can significantly increase the energy output of your solar panel system and maximize your return on investment. While the installation process may require some time and effort, the benefits of a solar tracker make it a worthwhile addition to your solar panel system. If you’re ready to take your solar panels to the next level, consider investing in a dual-axis solar tracker and start reaping the benefits of increased energy production today!