An epoxy floor can look fantastic when it is done right, but getting that smooth, even finish takes more than pouring coating onto concrete and spreading it around. Small bubbles, rough patches, roller marks, and tiny craters can show up before you know it. The frustrating part is that most of these problems start before the coating even goes down. Surface preparation, mixing, temperature, and the best roller for epoxy garage floor all have a part to play. Skip one important step and the final result can look messy, even when you use a decent product. The good news is that these issues are usually preventable. You just need to understand what causes them and avoid a few common mistakes.
1. Start With Proper Concrete Preparation
Concrete needs to be clean, dry, and ready to accept the coating. Sounds obvious, but plenty of people rush this part because they want to get on with the actual work. Dust, oil, grease, old paint, and other contaminants can interfere with epoxy adhesion and leave uneven areas. Start by cleaning the floor thoroughly and removing anything that could sit between the concrete and the coating. Depending on the condition of the slab and the epoxy system, mechanical grinding or another approved preparation method may be needed to create a suitable surface profile. Repair cracks and damaged spots with compatible materials, then let repairs cure properly. Moisture matters too. If water vapor is moving through the slab, bubbles or adhesion problems may develop later. Check moisture levels using a suitable test instead of guessing.
2. Understand Why Bubbles Form in Epoxy Coatings
Bubbles are one of the most common complaints with epoxy flooring, and they can happen for several reasons. Sometimes air gets introduced during mixing. Other times, air trapped inside porous concrete rises through the coating as it cures. Temperature changes can also make the problem worse. For example, applying epoxy while the concrete is warming up may encourage air inside the slab to escape into the wet coating. That can leave tiny holes, pinholes, or clusters of bubbles across the surface. Follow the manufacturer’s temperature and application guidance, including any restrictions on slab temperature and rising temperatures. Applying the coating when conditions are stable can make a real difference. If the concrete is highly porous, an appropriate primer or sealing coat may help reduce air release, provided the epoxy system allows it.
3. Mix Epoxy Carefully Instead of Rushing
Epoxy usually comes in two parts that must be combined in the correct ratio. Get that wrong and the coating may cure unevenly, remain soft, or develop other surface defects. Even when the ratio is right, mixing too aggressively can pull extra air into the material. Use a suitable mixing paddle at the recommended speed, scraping the sides and bottom of the container so both components blend properly. Follow the product’s stated mixing time and any instructions about transferring the mixture into a second container. Do not keep stirring just because you think more mixing must be better. Once the components are combined, pay attention to the pot life. Epoxy can heat up and thicken inside the bucket, particularly in warm conditions. Working with material that has started to thicken makes smooth application much harder.
4. Choose the Right Roller for a Better Finish
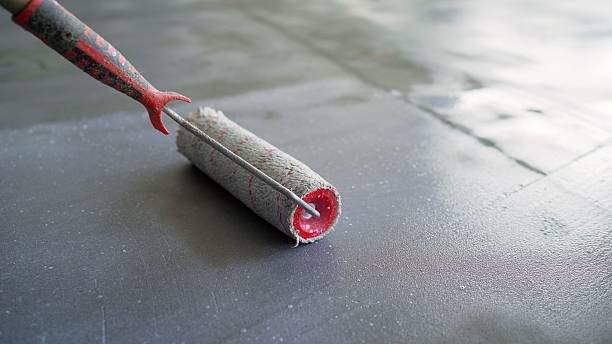
Roller selection is not a minor detail. The wrong cover can leave lint, streaks, uneven thickness, or unwanted texture in the finished floor. A short-nap roller cover designed for the specific epoxy coating is often a sensible choice, but the correct material and nap length depend on the product. Check the manufacturer’s recommendations before buying supplies. The best roller for epoxy garage floor applications should spread the coating evenly without shedding fibers or soaking up too much material. Use a quality cover, inspect it for loose fibers, and avoid pressing down too hard while rolling. Excessive pressure can create uneven coverage and may introduce air into the wet film. Work in manageable sections, maintain a wet edge, and avoid repeatedly rolling areas that have already started to set. More rolling does not always mean a better finish.
5. Control Temperature and Humidity During Application
Epoxy has a working range for a reason. If the room or concrete is too cold, the coating may become thick and difficult to spread. If conditions are too hot, the material can cure faster than expected, leaving less time to correct mistakes. High humidity can also create problems with certain epoxy products, including surface defects or a cloudy appearance when conditions are outside the specified limits. Before starting, check the air temperature, slab temperature, and relative humidity against the product data sheet. Keep the garage reasonably stable throughout application and curing. Avoid applying a coating just before a major temperature swing. Ventilation is important, but it should not mean directing dusty air or strong drafts across the wet floor. Give the coating a clean environment to cure in.
6. Apply Even Coats and Avoid Overworking the Surface
Putting down too much epoxy in one area and too little in another can create an inconsistent finish. Follow the recommended coverage rate instead of judging thickness by appearance alone. Spread the coating evenly and keep track of where you have worked, especially in larger garages. If the system calls for a primer, base coat, decorative flakes, or a separate topcoat, allow each layer to reach the required stage before continuing. Do not apply another coat simply because the surface looks dry; curing and recoat windows are not always the same thing. Also, avoid going back over spots repeatedly to fix tiny imperfections while the epoxy is beginning to set. That can leave visible roller marks and ridges. Sometimes the best move is to leave the coating alone and let it cure as directed.
7. Use Small Tools for Edges and Difficult Areas
Corners, edges, and tight spaces can be awkward when using a full-size roller. A small brush helps spread epoxy around posts, wall edges, and other spots the roller cannot reach cleanly. A 3 in chip brush may work for certain compatible coating applications, particularly where a disposable brush is useful, but check the product guidance before using it. Brush quality still matters. Loose bristles can become trapped in the finish, and rough application can leave visible lines along the edges. Apply the material carefully and blend it into the rolled section while both areas are still workable. Keep your tools clean and use the appropriate equipment for the coating. The goal is not to make every corner perfect with a brush; it is to avoid leaving thick ridges or obvious differences in texture where the methods meet.
8. Inspect the Floor and Deal With Problems Properly
Even with good preparation, a few imperfections can happen. Once the coating has cured sufficiently, inspect the floor under decent lighting. Look for pinholes, raised bumps, rough patches, and areas where the coating appears thin. Do not try to fix every defect while the epoxy is still wet unless the product instructions specifically allow it. For cured defects, the usual approach may involve sanding or grinding the affected area, removing all dust, and applying a compatible repair coat. Larger bubbles or widespread adhesion problems deserve closer attention because they may point to moisture, contamination, or incorrect mixing. Covering up the symptoms without fixing the cause often leads to the same problem again. Take the time to work out what went wrong before recoating.
Conclusion: A Smooth Epoxy Floor Starts Before You Roll
Bubbles and texture problems are annoying, but they rarely come out of nowhere. Poor preparation, trapped air, incorrect mixing, unsuitable temperatures, and the wrong roller can all affect the final result. The trick is to get the basics right before opening the epoxy kit. Prepare the concrete, follow the product instructions, choose suitable tools, and work at a steady pace instead of rushing to finish. If something does go wrong, find the cause before attempting a repair. A smooth garage floor is not about having the most expensive equipment or being a professional installer. It comes down to careful work, a little patience, and not cutting corners where they matter most.