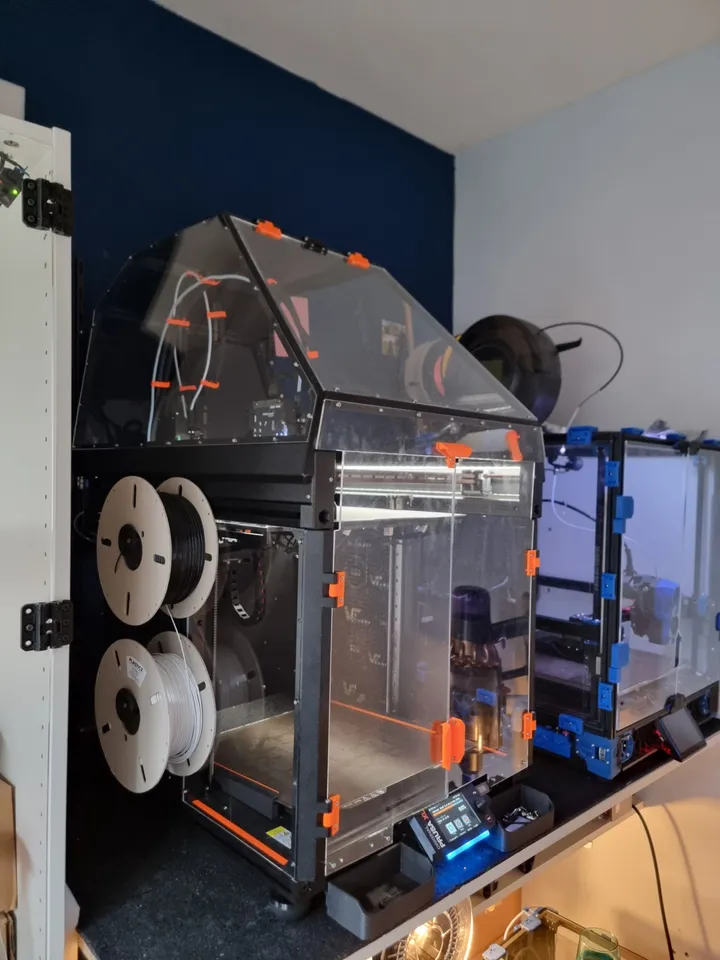
Prusa XL 3D printer enclosure
A 3D printer enclosure is a vital accessory that leads to finer print quality, enhanced safety, and greater efficiency. It creates a controlled environment with fewer temperature changes or dusty conditions – perfect for achieving optimal results with your Prusa XL 3D printer enclosure. When printing with ABS or nylon, this setup helps maintain proper heat insulation, preventing warping and failed prints.
This article will guide you step-by-step through preparing, assembling, and optimizing ventilation and temperature control. By the end, you’ll have a fully functional enclosure ready to elevate your 3D printing experience.
Benefits of Having an Enclosure
Understanding the benefits will guide you through building your enclosure:
- Stable Temperature – Prevents warping and improves adhesion.
- Dust and Debris Protection – Keeps movable parts clean, thus allowing for free movement.
- Noise Suppression – Lowers the sound levels within the work environment.
- Safe Operation – Encloses hot components and reduces the risk of accidents.
Step 1: Preparation of the Workspace
Before assembling, place the enclosure and printer in a suitable location, which will need to consider the following:
- Even and Stable Surface – Ensures stability during printing.
- Good Airflow – Prevents overheating within the enclosure.
- Accessibility to a Power Source – Keeps cables organized and avoids tripping hazards.
- Space for Maintenance – This will allow for easy access to the printer for adjustments.
Clean the area to remove dust or other obstruction before starting the assembly.
Step 2: Assembly of the Enclosure
Assembly instructions might differ from enclosure to enclosure, but the general steps are the same.
1. Unpacking of the Components
Lay all the packing material and check the manual to confirm that everything is there.
2. Setting up the Frame
Assemble the frame and ensure all screws are tightened properly to prevent any wobbling.
3. Fixing the Panels
Put the side panels on according to instructions, as well as the top and front, if it is transparent, clean it before fitting so you can see your printer well.
4. Fixing the Door and Latches
Fix the door if your enclosure is so provided, and test its operation. Ensure the seals are airtight in order to contain the temperature.
Step 3: Placing the Printer Inside
Once the enclosure has been put together, carefully place the printer inside, following these steps:
- Lift and place the printer inside gently – Avoid putting any stress on any potentially delicate parts.
- Cable management – Lay routing for power and data cables using the openings.
- Print bed clearance check – Ensure that all moving parts are out of the way of the enclosure walls.
- Level the printer – Confirm that it is placed even with an appropriate leveling tool.
Step 4: Temperature and Venting
Temperature management within your enclosure is of so much importance for the successful printing of parts.
1. Temperature Monitoring
Inside the enclosure, a thermometer is placed to monitor temperature fluctuations.
2. Ensure Proper Airflow
Inside the enclosure, you will have to adapt the ventilation system for the type of filament. ABS and nylon prefer a warm, stable atmosphere, while PLA prints better with fresh air flow. Control Humidity: Keep extra filament inside airtight containers with desiccants to mitigate moisture uptake.
Installing Extra Features may be another area of customization you may want to opt for:
- LED Lighting: Improves inside visibility of the enclosure.
- Filtration System: Helps fume extraction from some filaments.
- Camera Mount: for remote print monitoring.
Testing The Setup: Testing Goes Before Actual Printing.
You should conduct a series of small test runs before commencing larger prints to ensure that everything is in order.
- Check that the seals on the doors are intact and that there are no gaps that allow air to flow in.
- Run a small test part: a calibration model should be printed to check for stability.
- Watch how the printer moves, ensuring no obstruction to the movement of the print head. Any corrections with ventilation, cable placements, or printer placement are then to be considered.
Common Mistakes to Avoid
Even with cautious installation, several common mistakes tend to hamper performance. These are how to avoid them.
- Blockage of Ventilation Openings – Ensure clear airflow pathways.
- Loose Panels—Insist that all enclosure panels be tightly jammed; otherwise, the temperature will doubtfully fluctuate.
- Printer Misalignment – Make sure that the printer is leveled inside the enclosure.
- Ignoring Temperature Readings – Regularly check on internal conditions.
- Using an enclosure for PLA without ventilation, Overheating would cause softening.
Enclosure Setup Optimization Suggestions:
Adhere to these best practices to extract the best from your enclosure:
- Clean the enclosure regularly to avoid dust accumulation.
- Use a thermometer and humidity sensor for enhanced control.
- Proper filament storage to avoid any moisture-associated issues when printing.
- Monitor internal temperatures to avoid overheating.
- Permitting prints to cool down before opening the enclosure.
Conclusion
Having a Prusa XL enclosure for your 3D printer will increase the print quality, provide steady heat, and protect your desk space. With this step-by-step guide, you will be able to have a properly assembled and optimized enclosure for even better 3D printing performance. Trying to power through and wasting an hour nowadays will give you consistent results.


