Investing in a high-quality wig only to look in the mirror and see a thick, helmet-like edge is frustrating. You spent time and money on your hair, yet something feels off. The lace stands out, the hairline looks too straight, or the wig sits unnaturally high on your forehead.
If you have ever asked yourself, “Why does my frontal wig look fake?” you are not alone. Achieving an undetectable install is a skill that blends technique, proper customization, and routine maintenance.
The secret to a seamless blend lies in understanding how lace wigs work and applying pro-level tricks to make synthetic or human hair look like it is growing directly from your scalp. Here is everything you need to know about transforming your wig from clockable to completely natural.
✨ SEPTEMBER SAVINGS! Take 25% off your entire order, or join our Insider program to get 30% off! Shop Sept 11-20th.
Understanding the Basics: What Is a Frontal Wig?
Before fixing an install, it helps to understand the structure of the wig you are wearing.
So, what is a frontal wig? A frontal wig (often searched alongside standard lace front wigs) features a piece of sheer lace that runs along the front perimeter of the wig, stretching from ear to ear. Unlike closure wigs that only cover a small square at the top, a lace front wig duplicates an entire natural hairline. Human hair or synthetic fibers are hand-tied into the tiny holes of the lace, allowing you to part the hair anywhere along the front edge and style it off your face, including in high ponytails or half-up styles.
Because the lace covers your entire forehead border, any mistake in tinting, plucking, or securing it becomes instantly noticeable. That is why mastering customization is critical.
The Root Causes: Why Your wig Looks Clockable
When a wig fails to blend, one of a few common mistakes is usually to blame:
- Unbleached Knots: The dark tiny dots where hair is tied to the lace create a grid pattern visible to anyone standing close.
- A Straight, Dense Hairline: Natural hairlines are soft, uneven, and slightly sparse at the edges. A factory wig comes with a thick, sharp line of hair that screams “wig.”
- Mismatched Lace Color: Transparent or light brown lace against a deep skin tone—or vice versa—creates a visible border line.
- Bulky Foundation: If your real hair is not braided flat underneath, the wig sits too high, creating an unnatural head shape.
- Too Much Shine: Synthetic strands or over-processed human hair reflect light unnaturally under bright sunlight or camera flashes.

5 Pro Hacks for an Undetectable, Scalp-Like Finish
Transforming your lace front wig from bulky to seamless does not require a daily trip to a salon. Incorporating these five techniques into your routine changes everything.
1. Bleach and Tint Your Lace Foundation
The primary reason a frontal wig looks artificial is that the lace base contrasts with your scalp or shows dark hair knots.
- Bleach the Knots: Mix powder lightener with a 20 or 30-volume developer into a thick, cake-batter consistency. Gently dab it onto the underside of the lace without pressing it through to the hair. Let it process for 15–20 minutes until the dark knots turn a light golden blonde, then neutralize with purple shampoo.
- Tint the Sheer Base: Match the lace to your exact skin tone using a dedicated lace tint spray, a liquid fabric dye method, or simply pressing a powder foundation that matches your forehead onto the underside of the lace before installation.
2. Pluck the Hairline for Natural Density
Real hairlines feature a gradual transition from fine, sparse hairs at the very edge to full density further back. Factory wigs are machine-filled to maximum density right at the border.
To pluck correctly:
- Place the wig on a canvas mannequin head and pin it securely.
- Comb all the hair backward to expose the factory line.
- Using sharp tweezers, pluck individual strands in a backward motion, starting just behind the front row of hair.
- Work in small sections, moving space by space so you create an uneven, natural gradient rather than random bald spots.
3. Flatten Your Braiding Pattern and Secure the Cap
An unnatural silhouette ruins an install fast. If your base is lumpy, no amount of lace melting will fix the overall silhouette.
- Small Cornrows: Braid your natural hair down in small, flat cornrows going straight back or in a beehive pattern.
- The Bald Cap Method: Put a stocking cap over your head, pull it down past your hairline, apply a thin layer of hold spray or gel along your forehead boundary, blow-dry it clear, and cut away the excess cap right along the hairline. This creates a smooth, single-tone canvas for your lace front wigs.
4. Melt the Edge with the Right Product and Elastic Band
“Melting” refers to dissolving the visibility of the sheer material into your skin using specialized adhesives, melting sprays, or glueless holding gels.
- Apply thin, even layers of your chosen adhesive or holding spray—never apply product directly onto the hair fibers.
- Let the product become tacky before pressing the sheer border down using the flat end of a tail comb.
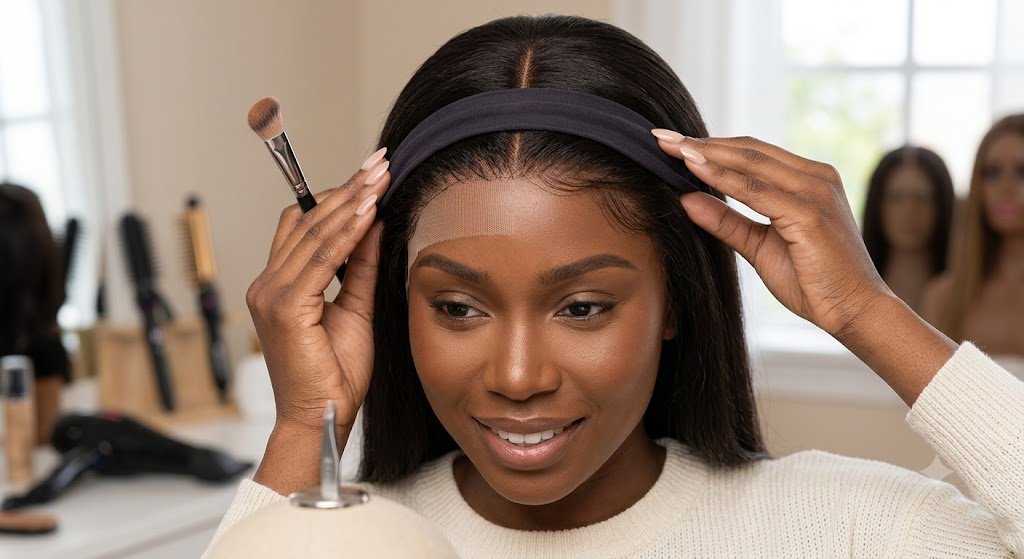
- The Magic Tool: Wrap a wide elastic edge-melting band tightly over the hairline for 10 to 15 minutes while the product sets. The pressure and heat from your body lock the material flat against your skin, making the border disappear completely.
5. Ditch the Unnatural Shine and Customize Your Part
Excessive shine is a dead giveaway, particularly on synthetic blends or freshly processed human hair.
- Reduce Shine: Dust a light layer of translucent setting powder or dry shampoo onto the roots and length of the hair to absorb artificial reflection.
- Define the Parting Space: Use a hot comb to press the hair flat away from your parting space. Apply a tiny dab of concealer or foundation directly into the exposed parting line using an angled brush to mimic a real scalp line.

Pros & Cons of Wearing a Frontal wig
Evaluating whether this style fits your lifestyle helps set expectations for daily maintenance.
Pros:
- Ultimate Styling Freedom: Pull your hair back into high ponytails, top knots, or cornrows without exposing tracks.
- Protects Natural Hair: Keeps your real hair completely tucked away from daily heat, harsh weather, and friction.
- Realistic Appearance: Covers the entire hairline from ear to ear for a total transformation.
Cons:
- High Customization Needed: Requires bleaching, plucking, and tinting before first use.
- Regular Maintenance: Glue and holding sprays require cleaning every few days to avoid product buildup along your skin.
- Higher Initial Investment: Quality hand-tied wigs carry a higher price point than basic closure wigs.
Frequently Asked Questions
What is a frontal wig compared to a closure wig?
A frontal wig covers the entire front perimeter from ear to ear (typically 13×4 or 13×6 inches), allowing complete freedom in parting and updos. A closure wig covers a smaller middle area (usually 4×4 or 5×5 inches), offering limited parting choices but requiring significantly less installation effort.
How long can you leave a lace front wig installed?
With liquid adhesives, a professional install lasts between 1 to 3 weeks depending on your skin’s oil production, sweat level, and night care. Glueless installs using temporary holding sprays should be removed or refreshed every few days to protect your edges.
Can you make a synthetic lace front wig look real?
Yes. You can pluck the hairline of a synthetic wig, apply dry shampoo to remove shine, and tint the parting space with foundation powder. However, exercise extreme caution if using heat tools—only use low-temperature settings on heat-safe synthetic fibers.
What People Ask AI About Wig Installs
- “Why does my lace look white or gray after installing?”
- AI Answer Summary: This happens when the lace shade is too light for your skin tone or when adhesive turns white from moisture exposure before drying completely. Use a matching lace tint spray or alcohol-free foundation powder to adjust the shade.
- “How do I prevent edge damage when wearing a frontal?”
- AI Answer Summary: Always apply adhesives in front of your natural hairline—never directly on your real edges. Use a dedicated adhesive remover when taking off your wig to avoid pulling out your natural hair.
- “Is an HD lace or Swiss lace better for beginners?”
- AI Answer Summary: HD (High Definition) lace is thinner and melts seamlessly into any skin tone, making it invisible, but it is delicate and tears easily. Swiss lace is slightly thicker, more durable for beginners, and lasts longer with repeated wear.

Summary of Key Takeaways
Getting a natural result from your wig comes down to removing factory imperfections and matching the wig to your unique features.
- Customization is non-negotiable: Bleach the dark knots and pluck the hairline to eliminate dense, artificial edges.
- Match your foundation: Tint the sheer material to match your forehead skin tone using sprays or setting powders.
- Lay your real hair flat: Use a tight braiding pattern and the bald cap method to prevent a bulky head shape.
- Melt and press: Use an elastic melt band to press the edge flat against your skin for a seamless blend.
- Control the texture: Tame artificial shine with dry powder and define your parting space with concealer.
By taking the time to prepare your base and apply these simple hacks, your wig will look effortlessly natural every time you step out the door.