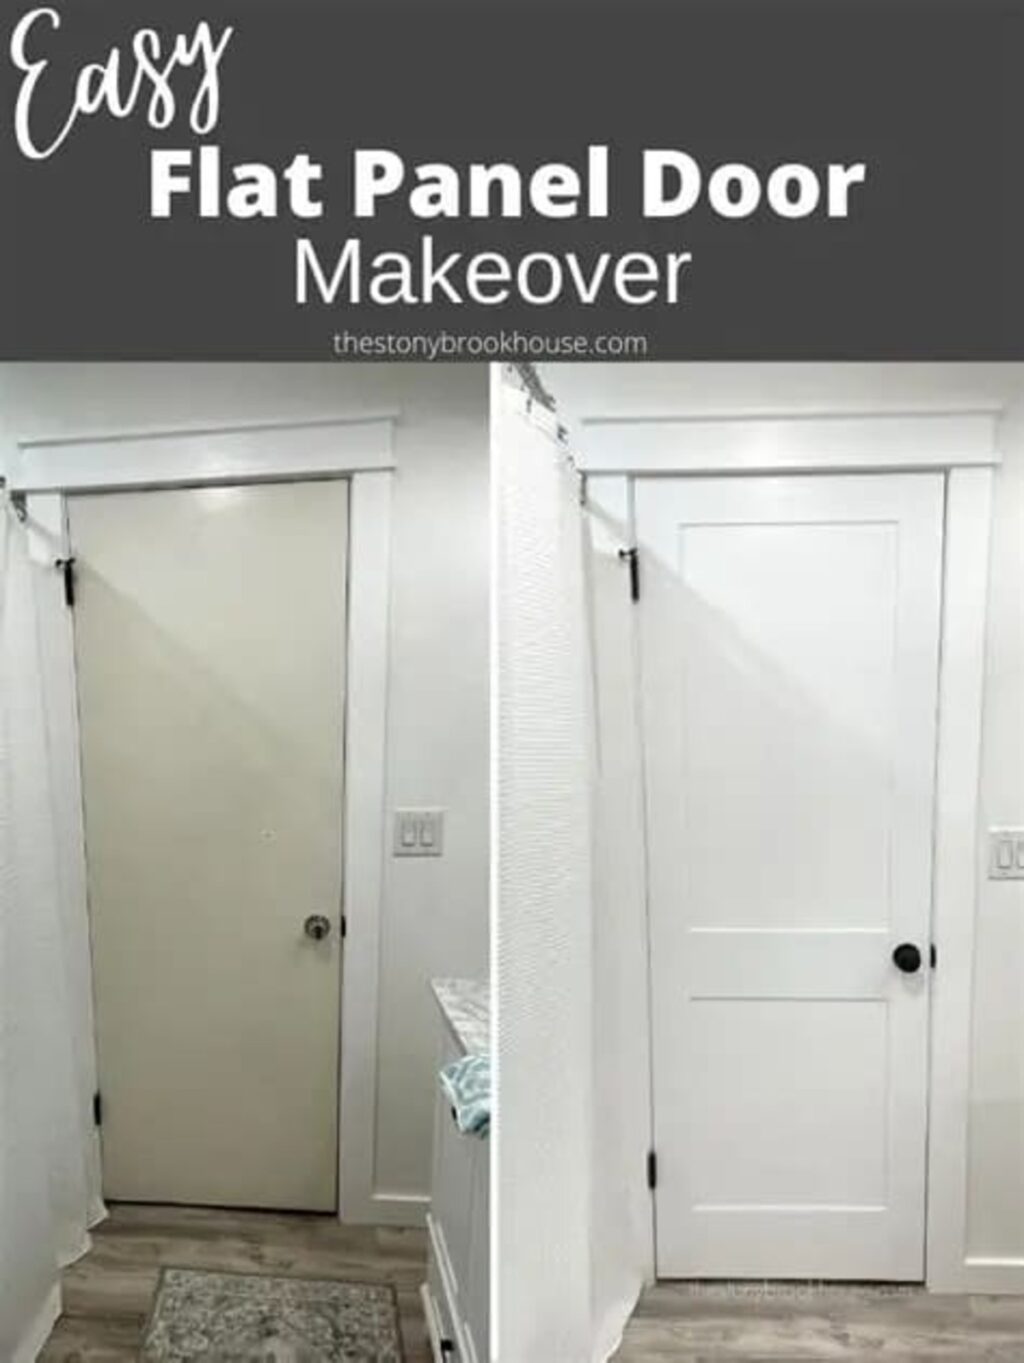
Transform Your Space with a DIY 5 Panel Door Upgrade – A home makeover does not always require expensive renovations or professional contractors. Sometimes, a single improvement can dramatically change the appearance of a room while staying within budget. One of the most rewarding projects for homeowners is upgrading a plain interior door into a stylish five-panel design. A DIY 5 panel door upgrade combines creativity, affordability, and functionality, making it an excellent weekend project for beginners and experienced DIY enthusiasts alike – gstarboard.
Whether you are refreshing an older home or adding character to a modern interior, a five-panel door creates timeless appeal that complements many decorating styles. With the right materials and careful planning, you can transform ordinary doors into elegant architectural features.
Why Choose a 5 Panel Door?
A five-panel door features five recessed or raised rectangular sections arranged vertically. This classic design has remained popular for decades because it offers a balance between simplicity and visual interest.
Unlike flat slab doors that may appear plain, a five-panel design adds texture and dimension to walls. The clean lines suit various interior themes, including:
- Farmhouse
- Traditional
- Craftsman
- Transitional
- Modern rustic
- Scandinavian-inspired homes
The symmetrical layout also makes rooms feel more refined without overwhelming the overall design.
Benefits of a DIY Door Upgrade
Upgrading an existing door instead of purchasing a brand-new one offers several advantages.
Cost Savings
New solid wood panel doors can be expensive, especially when replacing multiple doors throughout a house. By modifying your current hollow-core or solid-core doors, you can achieve a similar appearance for a fraction of the cost.
Increased Home Value
Small upgrades often create a significant visual impact. Attractive interior doors contribute to the overall impression of quality craftsmanship, which may enhance resale appeal.
Personal Satisfaction
Completing a DIY project allows homeowners to customize every detail, from panel size to paint color and hardware selection.
Sustainable Remodeling
Reusing existing doors reduces construction waste while giving old materials a second life.
Materials You’ll Need
The exact materials depend on your preferred method, but most DIY five-panel door projects require:
- MDF trim or wood molding
- Construction adhesive
- Measuring tape
- Level
- Pencil
- Miter saw
- Sandpaper
- Wood filler
- Primer
- Interior paint
- Paint roller and brushes
- Caulk
- Door hardware (optional upgrade)
Choosing moisture-resistant MDF is often recommended because it provides a smooth finish and paints beautifully.
Planning Your Design
Before cutting any trim, measure your door carefully.
Most five-panel layouts include:
- Two vertical stiles
- Four horizontal rails
- Five equally spaced rectangular panels
Creating a sketch beforehand helps ensure balanced proportions. Symmetry is essential because uneven spacing becomes noticeable once the door is painted.
Many DIYers use painter’s tape first to visualize the finished layout before attaching any molding.
Step-by-Step Installation
1. Remove the Door
Taking the door off its hinges makes installation much easier. Place it on sturdy sawhorses or a large worktable.
2. Clean the Surface
Remove dust, grease, and loose paint. Light sanding improves adhesive performance.
3. Measure Carefully
Mark every trim location using a level and measuring tape. Double-check measurements before cutting.
Remember the old saying:
Measure twice, cut once.
4. Cut the Trim
Use a miter saw to create clean 45-degree corners if using decorative molding. Straight cuts also work well for minimalist designs.
5. Attach the Molding
Apply construction adhesive evenly along each trim piece and press firmly into position.
Some DIYers use finishing nails for additional strength, although quality adhesive alone is often sufficient.
6. Fill Gaps
Use wood filler to cover nail holes and caulk along trim edges for a seamless appearance.
7. Sand Smooth
After the filler dries, lightly sand every surface until smooth.
8. Prime and Paint
Primer ensures even paint coverage and helps prevent MDF from absorbing moisture.
Apply two coats of high-quality interior paint for a durable finish.
Choosing the Right Paint Color
Paint color dramatically influences the final appearance.
Popular choices include:
Classic White
Bright white emphasizes clean architectural lines and works in nearly every interior.
Soft Gray
Gray offers modern sophistication while remaining neutral.
Navy Blue
A bold navy door creates a stylish focal point without overwhelming the room.
Forest Green
Perfect for farmhouse or traditional homes seeking warmth and richness.
Black
Matte black doors provide dramatic contrast in contemporary interiors.
Upgrade the Hardware Too
A beautiful door deserves equally attractive hardware.
Consider replacing:
- Hinges
- Door knobs
- Lever handles
- Privacy locks
- Strike plates
Popular finishes include:
- Matte black
- Satin nickel
- Brushed brass
- Oil-rubbed bronze
Matching hardware throughout the home creates a cohesive design.
Common Mistakes to Avoid
Even simple DIY projects require attention to detail.
Avoid these common mistakes:
Inaccurate Measurements
Small measuring errors become very noticeable once the trim is installed.
Skipping Primer
Raw MDF absorbs paint unevenly without proper priming.
Uneven Trim Placement
Always use a level before permanently attaching molding.
Rushing Paint
Allow sufficient drying time between coats to achieve a professional finish.
Ignoring Door Clearance
Added trim slightly increases door thickness. Ensure the upgraded door still swings freely without rubbing against the frame.
Styling Around Your New Door
After upgrading your five-panel door, consider complementary design elements throughout the room.
Examples include:
- Matching baseboards
- Crown molding
- Window trim
- Decorative wall molding
- Shiplap accent walls
- Coordinated paint colors
Together, these features create a polished and thoughtfully designed living space.
Is This Project Beginner-Friendly?
Absolutely.
A DIY 5 panel door upgrade requires patience more than advanced woodworking skills. Homeowners comfortable with basic measuring, cutting, and painting can usually complete one door within a day or over a relaxing weekend.
As confidence grows, additional doors throughout the home can be upgraded using the same technique, creating consistency from room to room.
Final Thoughts
A DIY 5 panel door upgrade is one of the most cost-effective ways to transform your home’s interior. By adding carefully positioned molding, fresh paint, and updated hardware, an ordinary flat door becomes a custom-looking architectural feature that enhances both style and value.
Whether your home embraces farmhouse charm, modern elegance, or timeless traditional design, a five-panel door offers versatility that never goes out of fashion. With careful planning, quality materials, and attention to detail, this rewarding DIY project can elevate your living spaces while providing the satisfaction of creating something beautiful with your own hands.
Frequently Asked Questions
Q: Can I upgrade a hollow-core door into a five-panel door?
Yes. Hollow-core doors are commonly used for this project because lightweight MDF trim adheres well without significantly increasing the door’s weight.
Q: How much does a DIY 5 panel door upgrade typically cost?
Most homeowners spend between **$30 and $100 per door**, depending on the molding, paint, and hardware selected.
Q: Should I remove the door before installing the trim?
Yes. Removing the door provides easier access, ensures more accurate measurements, and results in a cleaner, more professional finish.
Q: What paint finish works best?
Semi-gloss and satin finishes are the most popular because they are durable, easy to clean, and highlight the door’s panel details beautifully.